How to Change Your Mic on Windows 10
Found your internal microphone not working properly in Windows 10? Don't worry, you're not alone. This is a fairly common error, and it's usually not very hard to resolve.
Here we've included three possible solutions that have proved helpful to many users. You may not need to try them all; just work your way down the list until you find the one that works for you.
Fix 1: Update your device drivers
Fix 2: Set microphone as default device
Fix 3: Re-enable microphone in Device Manager
Fix 4: Modify privacy settings
Fix 1: Update your device drivers
If you got the mic-not-working issue after having Windows Updates, it's possible that the drivers (especially the sound card driver) you're using currently are out-dated, missing, or incompatible with your system. In case you're not sure whether all the drivers are working fine, you should check.
You can do this in Windows Device Manager, one device at a time. But this takes a lot of time and patience, and if any of your drivers do happen to be out of date, you'll need to manually update them, which is difficult and risky. If you don't have the time, patience or computer skills to update your device drivers manually,you can do it automatically with Driver Easy.
Driver Easy will automatically recognize your system and find the correct drivers for it. You don't need to know exactly what system your computer is running, you don't need to risk downloading and installing the wrong driver, and you don't need to worry about making a mistake when installing. Driver Easy takes care of everything.
You can update your drivers automatically with either the FREE or the Pro version of Driver Easy. But with the Pro version it takes just two clicks (and you'll get full support and a 30-day money-back guarantee):
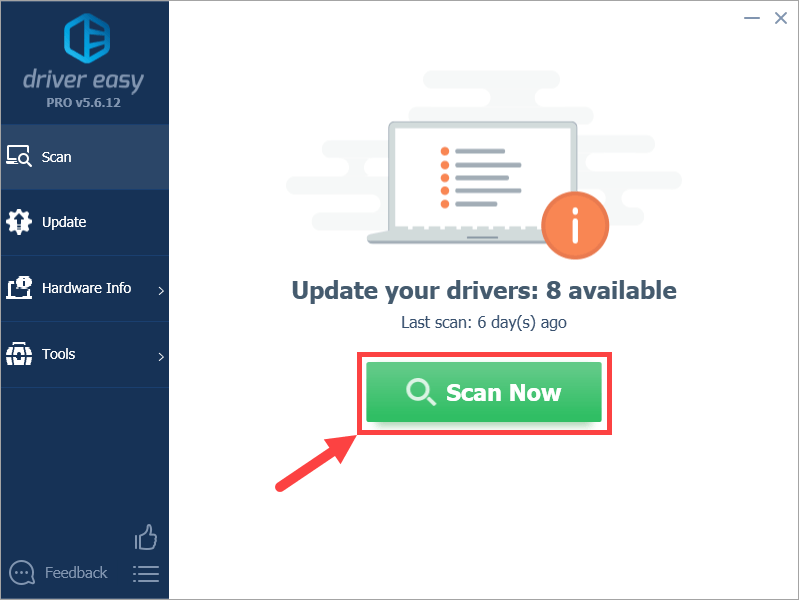
1) Download and install Driver Easy.
2) Run Driver Easy and click Scan Now. Driver Easy will then scan your computer and detect any problem drivers.
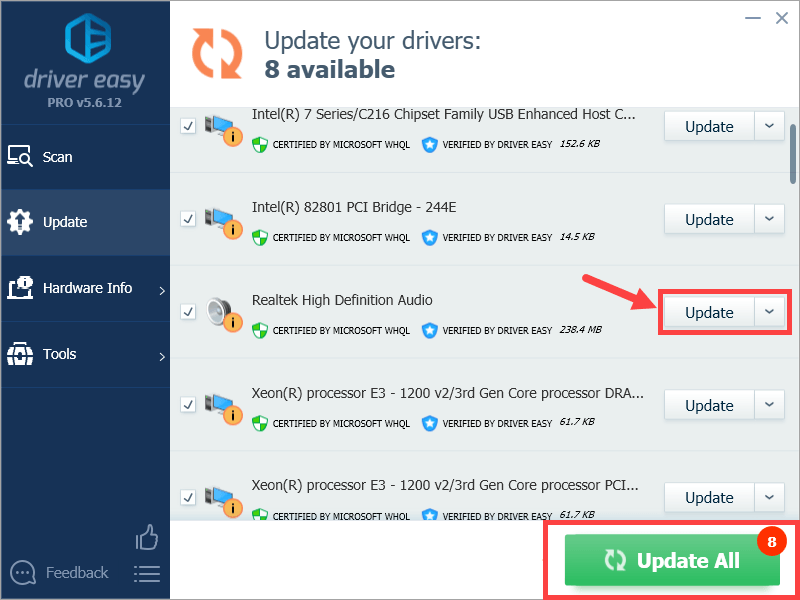
3) Click the Update button next to all flagged devices to automatically download the correct version of their driver, then you can manually install the driver (you can do this with the FREE version).
Or click Update Allto automatically download and install the correct version of all the drivers that are missing or out of date on your system (this requires thePro version – you'll be prompted to upgrade when you click Update All).
Note: If you have any problems using Driver Easy Pro to update your driver, please feel free to email us atsupport@drivereasy.com. We are always here to help.
Fix 2: Set microphone as default device
Chances are your mic has not been set as the default device, so the sound won't be played through it. To set your mic as default, you should perform the following procedure:
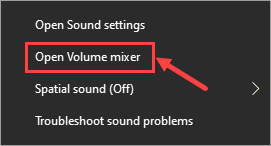
1) Click the speaker icon![]() in the notification area of your taskbar. Then clickOpen Volume mixer.
in the notification area of your taskbar. Then clickOpen Volume mixer.
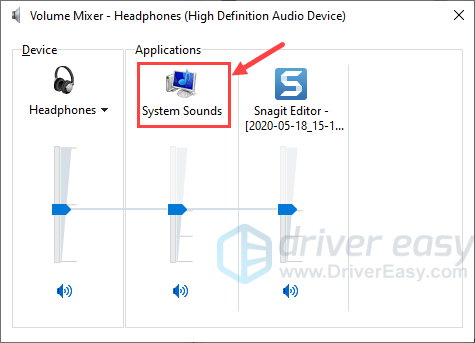
2) Select System Sounds.
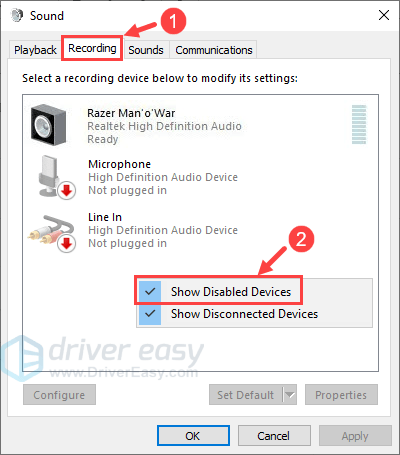
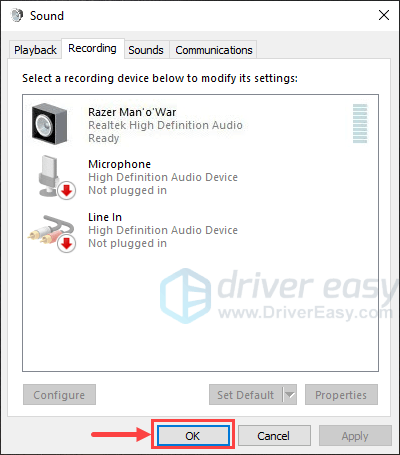
3) Go to theRecording tab, right-click an empty area inside the devices' display list, and then tickShow Disabled Devices to ensure that your mic device shows up.
4) Click to highlight your microphone, then click Set Default > Default Device.
Note: Your mic device may not be listed as "Microphone" and the icon thereof may not even resemble a microphone. You should be able to recognize it yourself.
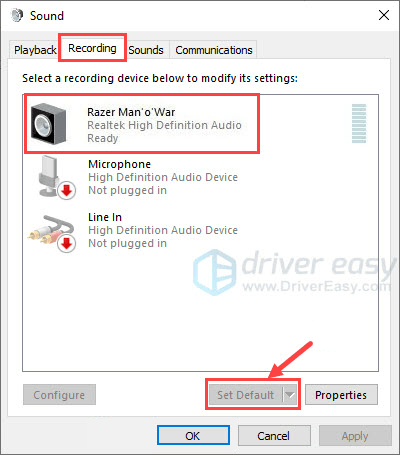
You can also right-click the mic item and check if it is disabled. If it is, selectEnable to get your mic working.
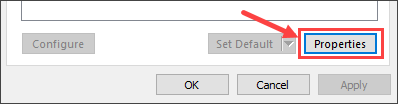
5) Again, click to highlight your mic. This time, click Properties.
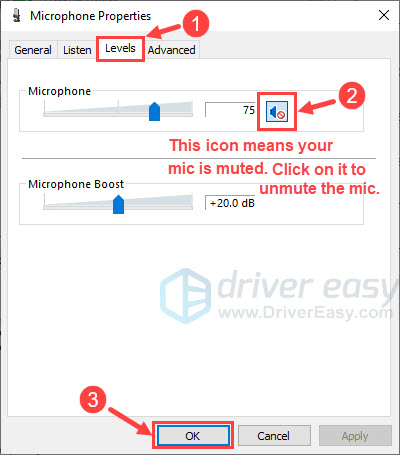
6) On theLevels tab, see if your mic is muted. In case it is (as shown in the following screenshot), click on the little speaker icon to unmute your mic. On completion, clickOK.
7) Click OK to save all the changes you've made.
Check to see if your mic is working fine. If it isn't, please move on to the next fix, below.
Fix 3: Re-enable microphone in Device Manager
This is a quick yet useful solution when your internal microphone ran into glitches. Just follow the steps below to disable and then re-enable the mic device from Windows Device Manager:
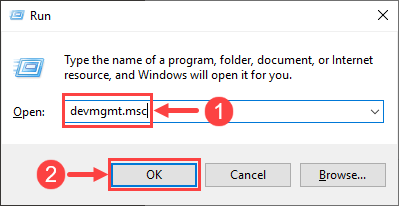
1) On your keyboard, press the Windows logo key and R at the same time to invoke the Run dialog box. Then, type devmgmt.msc and click OK.
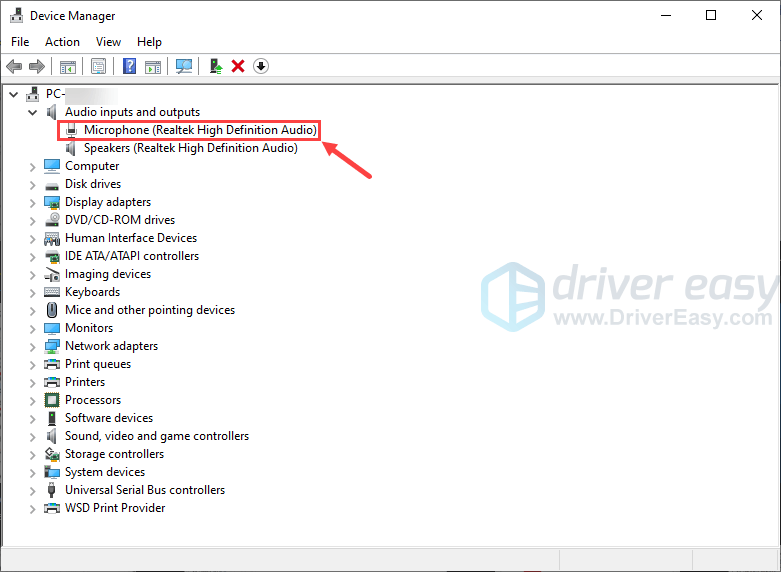
2) In the pop-up window, double-click the Audio inputs and outputs entry and find your mic device in the drop-down list.
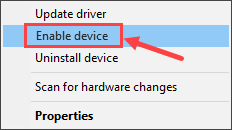
3) Right-click your mic and select Disable device.
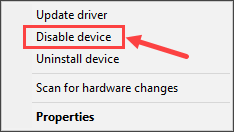
4) Wait a few seconds. Next, right-click your mic again and select Enable device.
Now check to see your mic is back on track.
Fix 4: Modify privacy settings
There's a possibility that your privacy settings related to the microphone has been reset after a Windows Update or other system events. If so, your mic may be forbidden to work normally. To check and modify these settings, here's what you can do:
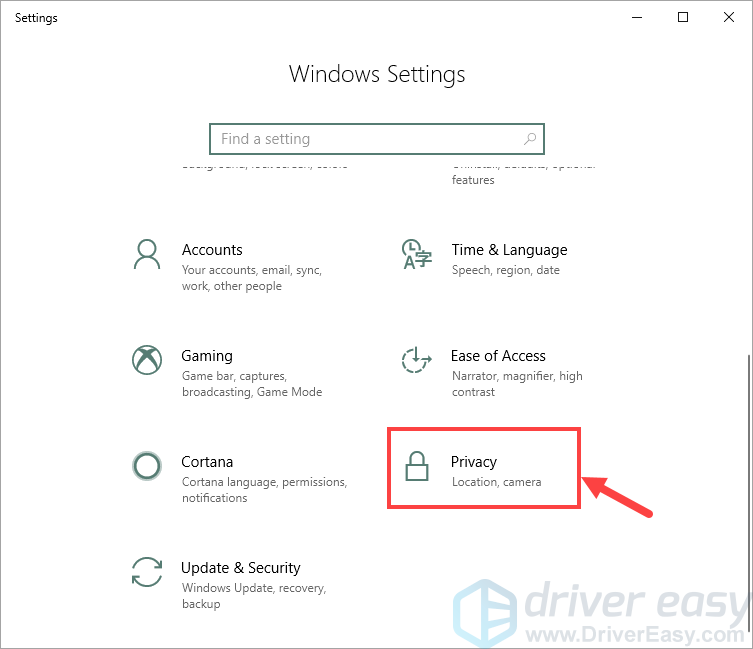
1) On your keyboard, press theWindows logo key andI at the same time to fire up theSettings window. Then, selectPrivacy.
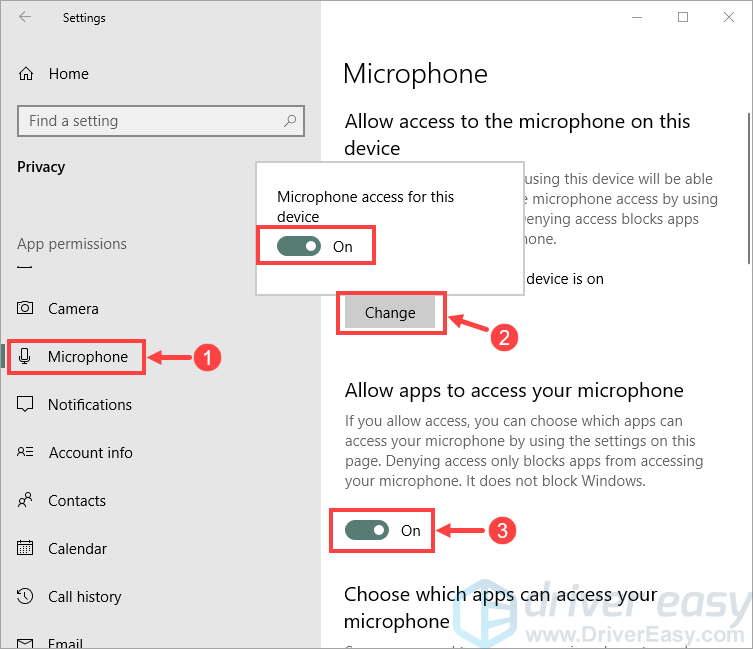
2) On theMicrophone tab, in the results pane, clickChange to see if the toggle forMicrophone access for this device has been set to Off. If it is, simply turn it on.
Below you'll see another toggle forAllow apps to access your microphone. Also turn it on if it's been set to Off.
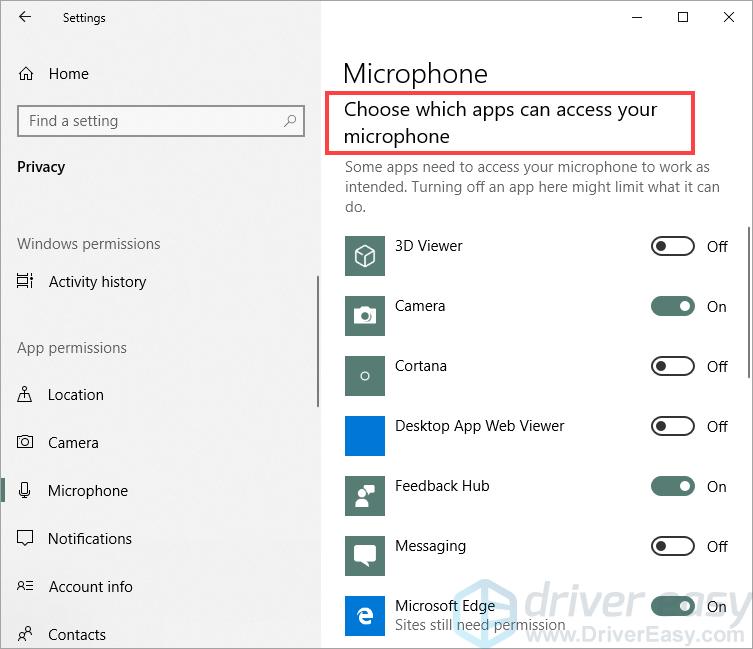
3) Scroll down and head over toChoose which apps can access your microphone. Make sure all the apps you need can access the mic.
If this fix doesn't work, please proceed to the next one.
Hopefully this article helped you resolve your mic issues. If you have any follow-up questions or ideas, please feel free to leave a comment below. Thanks for reading!
How to Change Your Mic on Windows 10
Source: https://www.drivereasy.com/knowledge/fix-windows-10-upgrade-issue-internal-microphone-not-working/
0 Response to "How to Change Your Mic on Windows 10"
Post a Comment